


Wood Backdrop
How to make a real wooden distressed double sided photo backdrop for photographers — DIY guide.
Check out the blog post below to learn how to make a genuine wooden photo backdrop for photos using secure materials.
You may utilize this wood photo backdrop in your photo shoots whenever you'd like because it's durable, lightweight, and adaptable. It also looks great and is built to last.
Step 1: Source your pine wood planks
You will want untreated pine boards from your local large DIY store:
These are ideal because they are extremely lightweight and easily stainable due to their lack of treatment. To ensure there are no splinters, they are sanded and smoothed to size.
Choose your size:
Determine the length and width of the space you need to fill by taking measurements. I selected:
• WALL: 7 planks at 175cm(h) x 20xm(w)
• FLOOR: 7 planks at 120cm(h) x 20cm(w)
Step 2: Buy the stain and white paint
I adore Javabean Dark Oak for the dark stain, but you may go with any color you choose. You can look for Coloron Wood dye in Jacobean Dark Oak by clicking on it. It gets darker with a few coats (plus some distressed). For 14 boards, you will need 2 of these (250 ml); if in doubt, get a third.
I use Rust-Oleum Chalky Furniture Paint for the white paint. White chalk furniture paint from Annie Sloan or other brands would function just as well. If necessary, seal it with matching matte wax (same brand suggested) to make it somewhat waterproof.
You may also use any white paint, matte emulsion, or bathroom wall paint! Just make sure it has little to no smell and is environmentally friendly (for safety).
Step 3: Distress the wood (1.5 - 2 hours)
Make use of what you have. All tools are great: a chisel for gouging and scratching, a screwdriver, sandpaper for smoothing rough sections, and a hammer for smashing dents around the edges. Please make sure you always stay safe and wear safety eyewear.
The secret is to naturally distress the wood to give it an aged, worn appearance. This is also great for staining because the sections that are disturbed will show much darker stains.
#TIP: Watch out for tree juice! Sap can leak out, and it's mega sticky.
Step 4: Stain the dark side wooden wedding photo backdrop
To accomplish this, make sure you have an old rag and some rubber gloves. Please work outside or in a location with good ventilation as well.
LOTS of shake the stain. After generously dousing your rag, begin rubbing the mixture into the boards in an even and seamless manner. This is an area where you can stay moderate, so go ahead and spread it wide!
Don't be afraid to apply it liberally—the more, the better—and work it into the troubled areas! It dries rapidly, so by the time you've completed the final plank, your first will be completely dry and prepared for a second coat, if desired (I used two coats for more darkness). Allow it to absorb and fully dry overnight.
Step 5: Paint the white side of wood back drop
You want two or three even coats of white paint for a clean finish if you like a minimalist design. If you want even more protection, you can apply a coat of matte furniture wax or varnish (only watch that it's not shiny, as this can affect your lighting!).
Allow the paint to dry completely before gently sanding some edges and corners to create an antique finish with a sophisticated, vintage vibe.
Allow it to cure for at least 4–6 hours or up to 24 hours, depending on the paint and the surrounding circumstances.
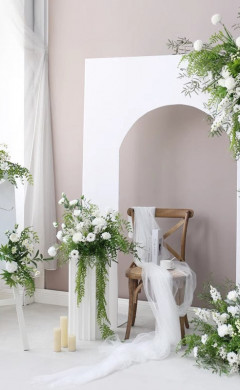
Step 6: Use wood panel backdrop in your studio
In our studio, I already have a long pole mounted behind the mounted backdrop system. This is used for two things: first, to neatly store rolled backgrounds behind; second, to clip the beanbag cloth into during poses.
Two strong metal hooks are securely attached to the wall to hold the lightweight metal pole in place. Professional installation was done on these. If you choose to use the same configuration, please make sure your pole is secure. I can "swing it" a little bit away from the wall because the pole is hollow and has a rope running through the middle.
To tilt the tall wood boards, place them behind the pole with the tops against the wall and the bottoms sticking out about 15 cm. Even though the pole would keep them from falling, I don't want them to try; thus, this is an additional safety measure. Place them so that they are leaning against the wall.
Please make sure the wall and floor boards are straight as you line them up.
To prevent the floor planks from skidding, place a non-slip rug mat underneath. However, exercise caution and use your discretion when determining what is necessary to maintain the planks stable and safe for your customers. This is dependent upon the layout and floor of your particular studio.
For an alternative arrangement, you can also arrange the planks width-wise.
Instead, consider using just the wood floor and a seamless wall backdrop. Additionally, you may create an "uneven" plank design on the floor by using the wall planks.
To quickly transition from dark wood to antique white, flip the boards over.
Really, all you have to do is this! To change the backdrop from dark wood to antique white, flip each board over one at a time.
If you want to use the boards in your studio, it's better to keep them loose instead of gluing them together. This way, you'll have more creative options available to you. Keeping the boards separate allows for more flexibility in how you arrange and use them. Gluing them together limits your ability to experiment with different layouts and configurations.
This can be done in one to two minutes, depending on your setup, and can be managed in a small space.
Step 7: Storing wood photo backdrop wall when not in use
Slide the boards up under the security pole when not in use.
This method of storing the boards is just one! Alternatively, arrange them flat on the ground, one on top of the other, or stack them in an alcove. Just be careful where you store them.
#TIP – You run the risk of wood warping if you leave your boards standing upright in a wet, humid, or cold place (like a garage or shed) for extended periods without utilizing them. If this is the case, I advise storing the flat on the floor.
If the wood warps, just lay it flat with the warp pointing away from the earth, and then, for a while, support it with heavy objects until it flattens out. That has never occurred in the five years since I made this drop, but there is always a chance with any woods.

