Wire Heart Wreath!
Wire Heart Wreath!
It's almost Valentine's Day, so it's time to decorate! Here's a quick and easy technique to turn a wire heart wreath into a gorgeous décor piece.
What You'll Need:
What I utilized for this project is as follows:
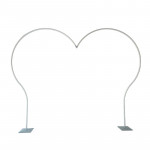
- A wire wreath shaped like a heart (you can get them on Amazon or at the dollar store!)
- Burlap ribbon (I got this adorable version at Dollar Tree with a chevron pattern)
- Oh, You're Lovely's Sola wood flowers
- The Oh You're Lovely greenery
Wrap the Wire Frame!
I began in the upper left corner of the heart to help conceal any possible glue spots because I knew I would cover the left side with flowers and greenery. I attached the ribbon with hot glue, being extremely cautious because burlap contains holes, and left a wire in between. After it had dried, I started pulling the ribbon firmly around the entire frame.
This is a 16" heart, so I required two rolls to cover the entire frame. I used the wire between the ribbon to reattach the piece to itself after the initial roll ended.
Attach the Base Greenery!
The wonderful part about wrapping the wireframe with burlap ribbon and merely gluing the ends of the rolls is that you make a pocket to fit wires!
I started by chopping the seeded eucalyptus foliage into smaller pieces to get the desired flow.
After that, I attached a piece with the leaves pointing downward to each of the ends—one at the top and one at the bottom. By doing that, you can: 1. maintain the heart shape, and 2. provide a natural sense to the foliage.
I covered as much of the ribbon as possible while changing how the leaves face to fill the middle portion. When you are finished creating this base, it will appear a little sloppy, but it is simple to straighten up once the flowers are added! We only need a sturdy surface to adhere the flowers using hot glue.
Add Wood Flowers!
I used 2.5" sugar & spice (pink), 1.5" gardenias (cream), 1.5" hydrangea blossoms (peach), and 1.5 "-3" sophias (burgundy) for the flowers. I painted the wood flowers using dip dye since I wanted a classic Valentine's Day color narrative!
I adhered the flower straight to the foliage foundation by using hot glue to its back to attach it to the heart. I used the smaller flowers to fill in any spaces left by the larger flowers, which I had started with first, spacing out the various hues.
I wasn't a fan of how the root leaves protruded once the flowers were on. I cleaned them up by cutting off the protruding too much, trimming them down a little, and then regluing them to conform more closely to the shape of the heart!
Add More Filler and Finish!
I aimed to give the blooms additional texture and fill in the wreath's floral area. I removed a few stems from the little cluster of white flowers, then painted and adhered bleached ruscus between and around a couple of the flowers. The wreath was finished once it acquired the desired dimension!
It's time to locate the ideal spot to display this lovely heart.
