


How to Make a Beautiful Floral Chandelier for Weddings

How to Make a Beautiful Floral Chandelier for Weddings
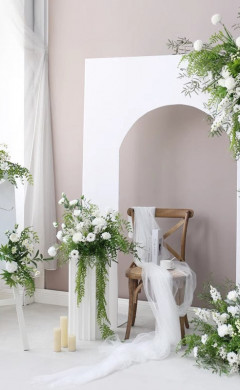
Small things make a big difference when it comes to wedding décor. You can create an immersive atmosphere at your event that makes every dimension come to life by decorating the ceiling with flowers and plants.
We’re here today to demonstrate how to use Flowersarch flowers and foliage to create a sophisticated and lifelike floral chandelier. You can use this item to liven up your wedding aisle, change your reception, or add colour to your home’s decor all year. You’ll also be shocked at how easy it is to create. By reading on, learn the materials you’ll need and the detailed directions for making this do-it-yourself floral chandelier.
What you’ll need to make a hanging floral chandelier:
You’ll need the following to make this DIY floral chandelier:
- Four flower pots with designs
- Two oval eucalyptus seedboxes
- One box of silver dollar eucalyptus and two branches of Ilex fic idea
- One long eucalyptus cluster with a spiral of branches
- One box of flocked lambs’ ear leaves
- One box of rose leaves
- Six blocks of floral foam
- Two branches of natural driftwood, each about 5.5 feet long.
- scissors and twine rope
- Pliers or wire cutters
- Your inventiveness
Flowers and foliage in a range of flower types, sizes, and colours, all in a unified colour scheme, are included in our designer flower box sets. Thus, you can make sophisticated floral arrangements without choosing several flowers by hand.
We utilized premium flower boxes in mauve and dusty rose for our chandelier, but you may construct several chandelier styles using any of our more than 12 colour palettes. You may also switch up the kinds of greenery to create unique or seasonal themes that go well with your flowers. Rules don’t exist. Therefore, feel free to personalize your chandelier however you like.
How to make a DIY floral chandelier:
Step 1: Assemble the base
Let’s begin by constructing our chandelier’s base. On the table, arrange your two driftwood pieces parallel to one another. After that, sandwich them with floral foam.
Attach the floral foam to the driftwood with strong twine or rope. To keep the driftwood tight, tie many bows throughout its length. Ensure the knots are positioned in the middle of the flower foam once you’ve tied them all. Next, cut off any extra rope with your scissors.
Step 2: Attach ropes
Attach ropes to your base at both ends. This will enable you to suspend your chandelier from the ceiling at your wedding or any other location where you intend to exhibit it.
For extra security, use a strong rope and tighten the knots firmly. Next, while working on it, locate a temporary location to hang the chandelier. This can help you see how it will appear at your location more clearly.
Step 3: Prepare the greenery
After finishing the chandelier’s foundation, let’s prepare our foliage.
Cut your leaves into single branches of varying lengths after removing them from their boxes. To make assembly easier, arrange your branches into stacks.
To give the finished chandelier a more organic appearance, attempt to vary the lengths of each cut.
Step 4: Add the leaves
Let’s begin decorating the chandelier with foliage now. Start by randomly introducing three to four of each cut branch into the floral foam. Start at one end of the chandelier and work up to the top half, which should be covered in beautiful foliage.
On the bottom, repeat the same procedure, carefully changing the height and length of the vegetation.
Advice: If the greenery on one side of the chandelier is higher than the other, that’s okay. We’ll counterbalance it with flowers.
Step 5: Add flowers
Our favourite part is using flowers to give the chandelier life and colour. As with the branches, take your flowers out of their box and place them in the flowery mud. You may change the height of the blooms by using their flexible wire stems.
Please try to use larger blooms as focal areas and encircle them with smaller, varicoloured flowers. When you find an arrangement you like, please don’t hesitate to take out the flowers and put them back in. This is your time to express yourself, so follow your gut and use your design sense.
As a tip, make three distinct parts out of the upper half of your chandelier, one for each flower box. Next, place the remaining flower box on the chandelier’s lowest portion.
Step 6: All finished!
Well done! You have completed your one-of-a-kind flowery chandelier. Hanging it up at your wedding location is the only thing left to do.
Browse our selection of prefabricated wedding decor to create your ideal appearance, or use our other do-it-yourself wedding guides if you need additional décor to finish your wedding.
Please tag us on Instagram with your completed chandelier after you’re done. We are very excited to see what incredible things you will create!