


How to Create an Instagrammable Flat Lay

How to Create an Instagrammable Flat Lay
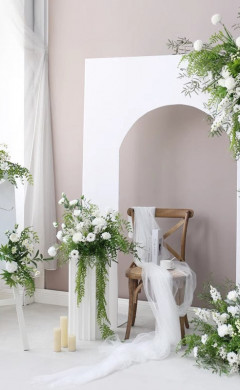
Making a new flower flat lay can lift your spirits and spark your creativity, whether you're sick of your boring daily routine or just need a little creative pick-me-up! The floral designers and event design manager team at B Floral are always up for a creative assignment, especially one that involves flowers! While we are renowned for our extravagant creations and enormous flower walls, we also enjoy paying close attention to even the most minor details! Making a floral flat lay is a fantastic way to relax and lose yourself in the moment. To create a fresh floral flat lie that is sure to get likes on Instagram, we've compiled a list of easy steps (and with some helpful advice). View our instructions and video below.
STEP ONE: Gather Your Materials
Select a color scheme, then begin gathering supplies and backdrop choices.
You Will Need:
-Your choice of flowers and plants
- Scissors or clippers
-Q-tips
-Tweezers
-A few background choices
STEP TWO: Find Your Natural Light
Your flat lay should ideally be created under natural light. Natural light is ideal for capturing flat-lay photos since it will make your colors and flowers really "pop."
STEP THREE: Test Your Backdrops
Arrange your primary blossoms on your selected backdrop and capture a few trial images. Take note of the direction of the lighting and the shadows, then reposition to your preference.
A textile background can be taped down to maintain stability and smoothness.
STEP FOUR: Choose a Focal Element and Focal Point
Place your focal flower in the middle of your composition after trimming it so that it will lay flat.
STEP FIVE: Choose and Deconstruct Your Second Floral Element
Attempt to split flower parts where they naturally unite instead of using scissors to chop off sections. Instead of cutting so the edges taper gradually, peel, pluck, and snap with your fingers.
STEP SIX: Arrange Your Second Element
Organize your disassembled flower components so the eye is drawn to the main attraction. Sort the parts by size, from large to small or light to dark.
By starting with three clusters of each element in varied sizes—a small, medium, and large cluster surrounding the composition—you may use the golden ratio to block out your composition.
STEP SEVEN: Deconstruct and Add Additional Elements
Proceed to disassemble and arrange the remaining flowers surrounding the focal point.
STEP EIGHT: Edit, Adjust, and Clean
Never be scared to rearrange and modify your components. Change it up if anything doesn't feel right. Use tweezers or a moist Q-tip for loose dirt or debris.
Step back and examine the edges, the final shape, and the spaces between the elements. Adjust the elements until the edges are clearly defined and seem perfect.
STEP NINE: Photograph Your Flat Lay
Take pictures of your flat lay from various perspectives.
Advice: Use a white poster board or cushion to reflect light if there are bothersome shadows.
STEP TEN: Edit Your Photos
To modify brightness, contrast, and other aspects of photos, use Photoshop or a comparable program.
Step eleven: Post Your Flat Lay!
Share your flat lay on social media to make someone's day (and your Instagram feed, for that matter) happier. Beautiful fresh flower flay lays are also made for unique backgrounds for computers and phones.